¶ Quick Start Guide
¶ I. Power On
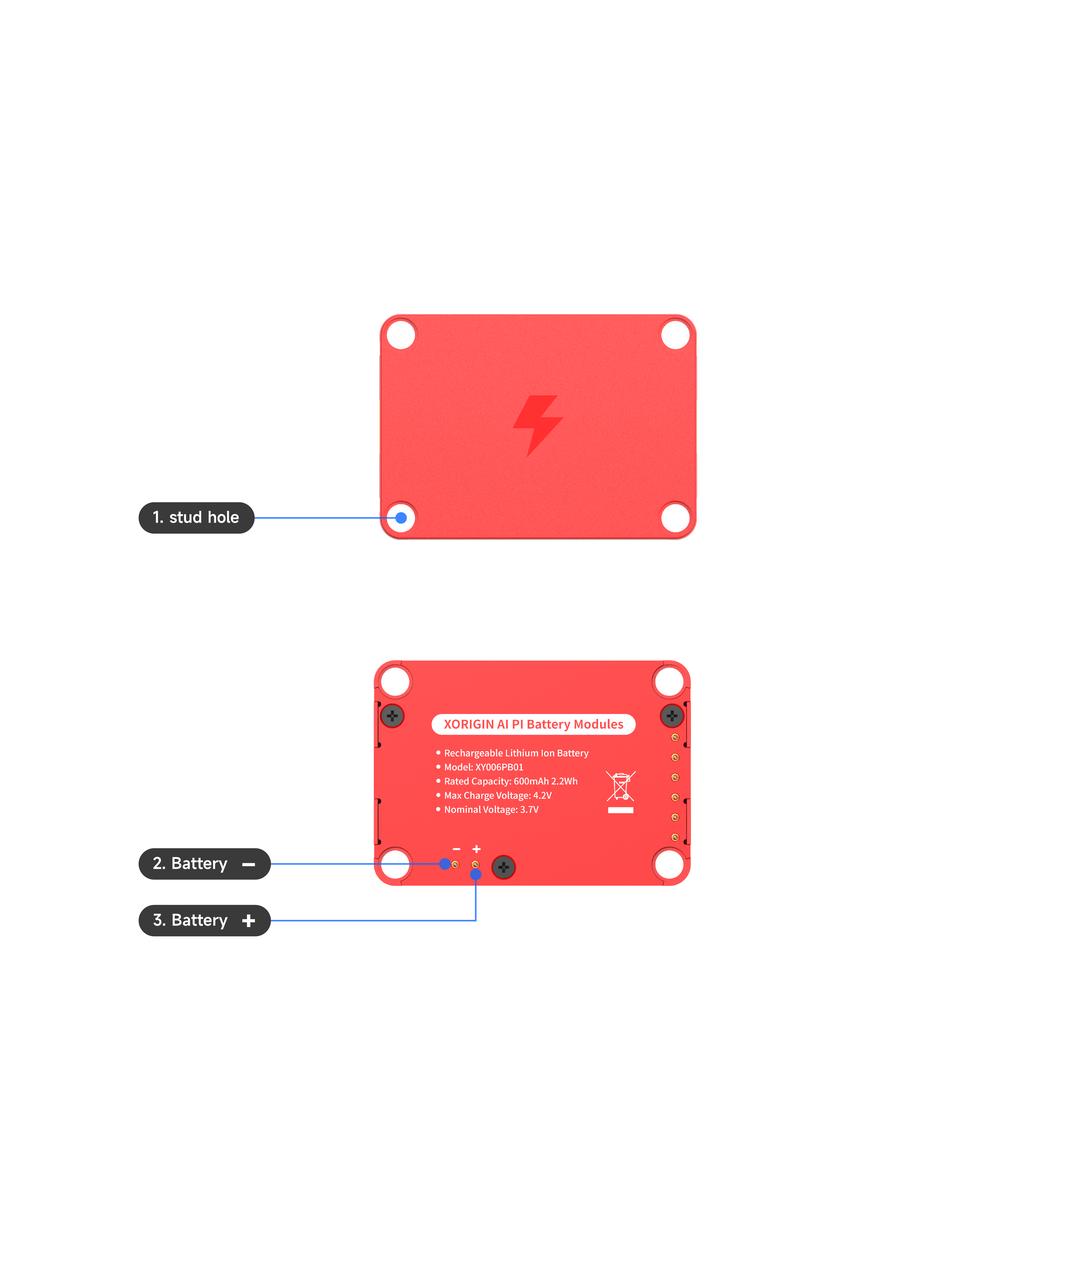
¶ Battery Power Supply (Battery accessories need to be purchased separately)
Pick up the battery module, adjust it so that the contacts face forward and are positioned at the lower right corner, then connect it to the back of the AIPI. When you hear a "click" sound, confirm that the four holes on the side are aligned (the battery is adsorbed), and the battery assembly is complete.

¶ Type-c Power Supply
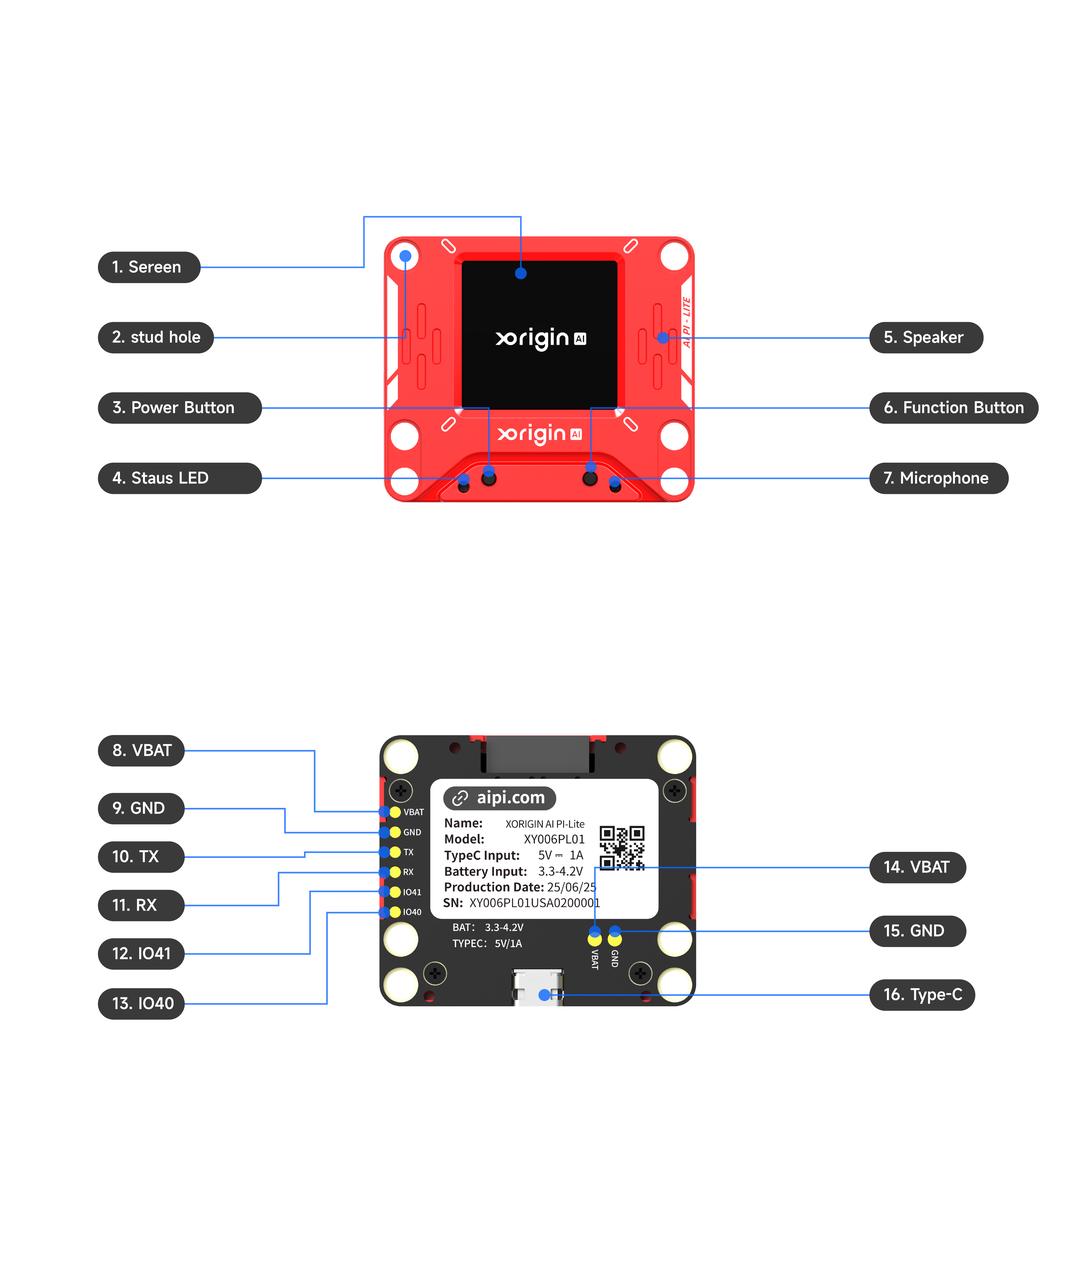
Connect the AIPI board to a Type-C charging cable to power the AIPI. After a successful connection, the AIPI will automatically power on and display the logo pattern, indicating that the boot is successful.
¶ II. Power On
¶ Battery Power Supply
After the AIPI is successfully powered on, short-press the power button. When the status light turns white, long-press the button until the logo pattern appears on the screen, indicating a successful boot.
¶ Type-C Power Supply
Connect the AIPI board to a Type-C charging cable to power the AIPI. Once successfully connected, the AIPI will automatically power on, display the logo pattern, and confirm a successful boot. In Type-C power supply mode, the device will remain operational continuously and cannot be shut down.
¶ III. Power Off
¶ Battery Power Supply
When the AIPI is only connected to the battery module and powered on, short-press the power button. The status light will turn white, then long-press until the screen and status light turn off, indicating the AIPI has successfully powered off. (Alternatively, remove the battery module to power off the AIPI.)
Note: When the AIPI is connected to a Type-C power cable, the power button will be inactive, and it will remain powered on.
¶ Type-C Power Supply
When the AIPI is only connected to a Type-C power cable and powered on, unplug the Type-C power cable to successfully power off the AIPI.
¶ IV. Charging
When the AIPI is using a battery module and connected to a Type-C power cable, it will be in charging mode. In this state, the AIPI can be used normally, and the status indicator at the bottom of the screen will show yellow or green. If the status indicator is yellow, it means the AIPI is in charging mode and the battery is not fully charged; if the status indicator is green, it means the AIPI is in charging mode and the battery is fully charged.
¶ V. Connect to the Internet
¶ Device Connection
When powering on for the first time, you need to connect to the AIPI network and follow the on-screen instructions. First, connect your phone to the AIPI hotspot "Pl-Lite-XXXX" (the "XXXX" varies for each AIPI,check the screen serial number for details)
¶ WIFI Network Connection
After successfully connecting to the AIPI network, it will automatically jump to the WIFI network connection. Select the corresponding WIFI and enter the password. Once connected to the internet successfully, the AIPI will automatically restart.
¶ Activation Code
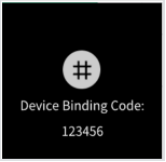
After successfully connecting to the internet for the first time, the AIPI will broadcast a six-digit verification code. At this time, use a browser on an internet-connected terminal device to open the Xorigin Development Community, visit https://xdc.aipi.com, register an account as prompted, and after logging in successfully, enter the activation code in "My Account" (purchase the activation code from AIPI.com) to add the device.
¶ Create an Agent
Click "New Agent," fill in the basic agent information to complete the basic creation. Select "Xorigin Model" for the model, click "Confirm," and the agent is successfully created.
¶ Add a Device
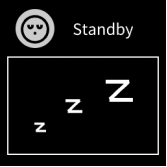
Click "Add Device," enter the verification code broadcast by the AIPI. After successful verification, re-plug the Type-C cable to restart the development board. After a successful restart, the AIPI will automatically enter standby mode.
¶ VI. Conversation
When the AIPI is in standby mode, short-press the function button on the right side of the AIPI to enter the listening state, where you can converse with the AIPI. To interrupt, say the wake word "computer" or short-press the function button.
Network Configuration Status: In this state, users need to configure the AIPI's network according to the network setup steps described in the manual. After successful configuration, the device will enter the "Network Configuration Successful" state.

After successful network configuration, the device will automatically restart. If the network connection is successful, the following prompt page will be displayed.

Activation Status: In this state, users need to log in to the Xuanyuan Development Community and follow the steps above for binding the agent to activate the AIPI. After the binding is completed, the successfully activated AIPI will enter standby mode.
Standby Status: In this state, the device waits for user interaction. Users can short-press the function button to enter the listening state, or use the voice wake-up word "computer" to activate listening mode on the AIPI.
Listening Status: In this state, the AIPI will listen to your speech. It will enter the answering state once you finish speaking, or you can short-press the function button to return to standby mode.

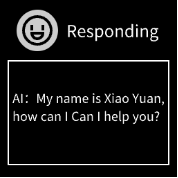
Answering Status: In this state, the AIPI will respond to what you said during the listening state. Once the response is complete or you interrupt it with the wake-up word "computer," the AIPI will return to the listening state. You can also short-press the function button to switch back to the listening state.
Upgrading Status: In this state, the device is upgrading its firmware. Do not operate the device during this process.

¶ VII. Common Problems and Solutions
¶ How to confirm the AIPI has powered on successfully?
The AIPI's screen displays content normally, and the status light indicates a normal operating state.
¶ The AIPI does not respond when I talk to it.
The AIPI might be in the answering state. Short-press the function button to enter the listening mode, or use the voice wake-up word "computer" to activate listening. Alternatively, check the network signal—poor connectivity in the current location may cause delays or interruptions in voice interaction.